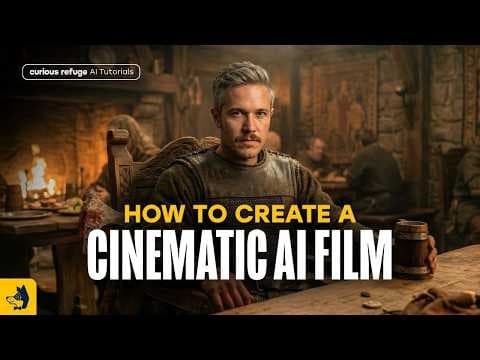
Створення фільму за допомогою AI: повний пайплайн
Відео показує процес створення фільму з використанням інструментів AI, від генерації ідей до редагування відео. Акцент робиться на використанні AI як креативного помічника, згадуються Midjourney, Google Nano Banana і Topaz для покращення якості відео.
Ключові тези
- Інструменти AI можуть допомогти на різних етапах створення фільму, включно з генерацією ідей, написанням сценарію та створенням візуальних ефектів.
- Підтримка консистентності персонажів і візуального стилю вимагає ретельного опрацювання запитів та ітерацій.
- Інструменти AI для відео, такі як Freepik, Gen-2 та Google Flow, можна використовувати для створення відеокліпів.
Зменшення витрат на виробництво відеоконтенту на 50-70% • Швидке створення прототипів та візуалізація ідей • Можливість експериментувати з різними стилями та персонажами
Важливо враховувати обмеження AI-інструментів, такі як проблеми з консистентністю персонажів та необхідність ручного редагування для досягнення бажаного результату.
Опис відео▼
In this video, I'm going to show you the latest techniques for creating a professional AI film. By the end of this video, you will know the exact steps that you need to take in order to create a really compelling project, but I should note that the entire process of making a film is definitely going to take some time. So, this is really meant to be a jumping off point. If you want to learn more about the extensive process of putting a huge film together, I highly recommend checking out our courses over at Curious Refuge. So, let's get to it. My name is Caleb. Welcome to the channel. Be sure to like and subscribe. So, the first thing that we need to talk about is the idea. A film always starts with an idea. So, where do you get ideas? Well, the quick answer is it's all about observing your day-to-day life. There are certain stories that may resonate with you, whether they're personal stories or things that you observe. So, I highly recommend having a document, whether it's a note on your phone or literally a notebook, where you put your film ideas. Once you have an idea, it's time to turn it into a logline. A logline is a simple sentence that explains what your core idea is all about. It will give information about who the characters are and what the conflict is. When you use AI more as a creative assistant rather than somebody who is replacing you in the storytelling process, it's where the magic happens. So, after you have the logline for your film, you then want to work on a treatment. A treatment is a single document that lists out your characters, the conflict, and the main story beats inside of your film project. Now, a treatment is helpful because it gets into just enough information for you to creatively convey your film idea to other people. If you're working on a film by yourself, you don't have to put together a treatment. It's entirely up to you, but it can be helpful if you want to involve more people in the process. So, once your treatment is complete, now it's time to move on to screenwriting. So, screenwriting is a very extensive process, and similar to coming up with ideas, if you rely on AI alone, your script is frankly going to be pretty boring and terrible. But if you use AI to assist you with the process of putting together a script, that's where the magic happens. Because there are so many subtle nuances with the screenwriting process, I'm not going to get into the nitty-gritty of breaking down a story inside of this video. But if you want to learn more, you can check out our AI screenwriting and AI filmmaking course over at Curious Refuge. Okay, so now it's time to focus on the visuals. The first thing that you want to do when you're working on a film project is go to various AI tools for creative inspiration. This inspiration can be everything from the style of your film to the actual characters that are present inside of your story. For example, you can go to tools like Midjourney and search for whatever stylistic inspiration you're looking for. So, for our example, I'm going to say Vikings and just kind of see visually what we have inside of our scene here. Now, of course, this is Midjourney, so you need to take a look at all of the intellectual property concerns with a grain of salt because in this specific example, of course, you can see a lot of Vikings from the TV show Vikings. So, that is problematic if you want to monetize your film in the future. So, just be sure that any images and videos that you create do not have any third-party IP. You can also go over to other tools like Freepik's stock photography library that has different AI generations that other people have created. For example, we typed in the prompt Vikings cinematic, and now we have a bunch of images of Vikings, and we could pick and choose the ones that we want to use for our film project. For example, if we like this image here, we can go ahead and click the download button and save it to a folder on our computer. Now, when it comes to creating a style for your film, I think going to these stock libraries and downloading your images is really helpful. But when you're ready to actually create your characters, now comes the fun part. Now, it's time to actually use AI to create your images. Now, to create our images, you have different options. There are a lot of image models out there, but there's two main ones that I want to focus on inside of this video. The first is Midjourney. Midjourney creates really impressive, highly cinematic images. The problem is it's not as good at following your specific direction. So, it's really good for base style and maybe the initial character, but it's going to be more challenging over time to get consistency with that character. So, you're going to have to hop into a different image generator whenever you get into the storyboarding process. Now, the second tool that I want to talk about is Google Nano Banana. There's two different versions of Nano Banana. You have Nano Banana 2 and Nano Banana Pro that I really want to focus on inside of this video. For our quick example, I'm going to type in a prompt in the image generation feature inside of Freepik, and I'm going to select the Nano Banana 2 model. Now, you can select other image models if you want directly inside of the tool. And the cool thing is inside of Freepik, they actually have a multiple model that allows you to select multiple image generators at a time, which is cool. But for our example, I'm going to select Nano Banana 2 and say a cinematic still of a battle-hardened Viking, and then get into a ton of information about what we want that Viking to look like. Now, in AI creativity, it's all about iteration. So, for our example, I'm going to hit the plus icon to generate four images at a time, and I'm going to change our aspect ratio to 16 by 9 because we're working on a film project, and go ahead and click generate. Now, one quick tip is go ahead and hit that generate button a few times. It will allow you to create essentially 16 images at a time, which is really helpful. So, we generated a lot of images, but I really liked this character specifically. I thought he really embodied kind of what we wanted our main character to look like for our specific film project. So, now that we have our main character, we want to create what is called a character sheet to show different angles of our main character so that we can get better consistency whenever we use AI image tools to generate our scenes. So, let's take this character and drop him into the image upload section inside of Freepik. Now, you can use any aggregator that you want. I'm using Freepik because I really like the interface, but tools like Adobe Firefly or Krea are also really, really powerful. So, for our prompt, I'm going to say create a four-panel layout of this character standing on a white background with one of the panels front-facing, one to the side, one behind, and then a close-up of his face. And like always, you're going to want to up the number of generations to be as many as possible, so we'll say four. And for this specific generation, because this is going to be an asset that we use again and again as a character reference, we want to have maximum resolution. So, I'm going to select 4K here and go ahead and hit generate. And after a few seconds, we have a few different images here. We have number one, which looks really good. We definitely could use that. We have image number two, which again looks good. That's exactly what we're looking for. Image number three, uh maybe not so much. I don't know why it's covering up his face. And then we have image number four, and no idea why he just randomly is uh looking uh maybe where he shouldn't be looking right now. Uh so, this kind of brings up a really interesting point. In the process of creating an AI film project, you're going to get really weird results, and that's all a part of the process. It's more about iteration and refining your prompts than it is generating a single image at a time. That's why whenever you utilize language-based tools like ChatGPT or Google Gemini directly, it's not as helpful for a creative process because you have to wait for individual images to generate again and again. And a lot of times, if you're only getting one output at a time, you may think that the problem is your prompt whenever the actual problem is just you didn't generate enough images. Okay, so you'll repeat this process for all of the characters inside of your film. For our example, I'm just going to use one character just because I want to quickly show you the process, but hypothetically, you would do this for most of the main characters inside of your film project. So, now it's time to create a storyboard and shot list for your project. You need to at the very least have a shot list, if not a storyboard, for your film projects because it just helps with communication and keeping everything organized. If you just rely to going to the AI video tools alone, you're going to see that there's just some severe lapses in continuity. So, it's very important to make sure that you have a defined list, and you can keep this list inside a simple spreadsheet. You don't have to get super complicated with it. Now, once you've defined your shot list, you can get into the process of creating a storyboard. A storyboard is a rough visual approximation of what you want the composition to look like inside of each one of your individual shots. It's still actually really helpful for the AI filmmaking process, even though you do have the ability to create photorealistic imagery with just a prompt alone, but I really find that with simple sketches, it allows you to have more creative flexibility, and your brain doesn't get so locked in on some of the supporting details that will be found whenever you create photorealistic imagery. So, here's a quick example of a storyboard that we put together. In order to create these scenes, you literally just can bring in the reference information that you need from your shot list and prompt for a simple storyboard drawing. So, in our example, we have shot number one of our Viking, shot number two of them picking up their shield, and then shot number three of them running into the battle. And to organize everything together, I'm using a Freepik space. In order to use a Freepik space, all you have to do is go to the spaces tab and click on new space. Now, I should note I'm not sponsored by Freepik, nor have I ever been. I just really like their tool. So, you can see here we have dropped in each one of our storyboard scenes and shots into our actual canvas. And if we wanted to, we could bring in our characters, our style references, and everything and work inside a node experience inside of Freepik. I actually do not prefer to utilize that workflow whenever I'm working on a film project because it can get messy and slow very quickly. So, once you've defined what you want your actual sequence of shots to be, now it's time to make them photorealistic. So, how are we going to convert our storyboard into actual realistic images? Well, let me show you. So, I'm inside the image generation tool inside of Freepik. And first things first, we need to define our style. Our style could be defined from images that we pulled from other tools like Midjourney, or there are actually stylistic presets inside of Freepik. For example, if we click on this, we can go to cinematic and do low-key cinematic. For our example, I'm going to use this as our style, but of course, you could use images if you wanted to. Now, for our character, let's bring in our character sheet from earlier. So, again, we have our image of our Viking warrior here. Let's drag and drop him into the character section. And let's bring in our very first image of our storyboard. We have our Viking warrior holding his axe, and we'll go ahead and drag and drop that into the image upload section. Okay, so we have three different types of assets that we pulled into this scene. So, now let's type in a prompt. For our example, I'm going to say a cinematic still of a battle-hardened Viking. You get the idea. So, this is the same prompt that we used earlier to generate our first shot, but now we're going to pull in the reference images that we uploaded. So, let's give specific instructions to Nano Banana 2 here and say, "Use the composition from image number one, which is our storyboard, and keep the character as at character number one." So, when you're ready, go ahead and up the maximum number of generations to as many as you can get. Your aspect ratio in this instance is 16x9, and for this one, I'm going to do 2K outputs because that will give us really good quality for uploading the images into our video tools in the next step. And go ahead and click generate. Now, after a few seconds, we have some images that we can take a look at. So, we have number one, which looks pretty cool. We have number two, which is really close to the storyboard that we uploaded, but maybe a little too sharp on the edges. We have number three, which I don't know if the character consistency is the best. And then, finally, we have number four, and I really like number four. I think this is pretty sweet. It seems very high-budget and cinematic. I think it did a really good job. So, I'll go ahead and download that to my computer. So, you'll go ahead and repeat this process for all of the shots inside of your film scene. Now, I should note that you may go back and forth and realize that you may need to subtly tweak various prompts or various parts of the composition, but it's entirely a part of the process. It's a back-and-forth conversation with the AI tool. It's not something that is as rigid as the traditional filmmaking process. You'll go through this entire process to create all of the images for your scene. It's important to keep everything organized so you can use tools like Freepik Spaces to organize the final shots below your storyboard. So, it's all just in one place. So, you may be wondering, what is the very best AI video tool on the market? And the short answer is, there's not a best AI video tool on the market. There are some tools that are better than others, but for some specific shots, you may have to hop between different AI video models. That's why it's really important to have access to an AI video aggregator that can give you the option to select from different AI video models. Right now, I'm generating inside the video section of Freepik, but the same could also be true of Gen-2, which is ByteDance's model. You could also generate videos inside of Google Flow or even Adobe Firefly. So, first things first, we're going to upload our starting image. So, let's go ahead and grab our first image here. This is our main character, and let's drag and drop that starting image to the starting section. Now, some video models, not all, allow you to upload an ending image. So, your entire scene will interpolate from the start image to the end image. It entirely depends on what you're trying to get out of your scene, but sometimes, if you want meticulous control over the action, that can be helpful. Now, for this generation, I'm going to select Kling 3.0, but you can select SeaDance, you can select Google Vio, you can select whatever AI video model you want. You can see the up-to-date scores that we've given them over on Curious Refuge. You'll find the link below this video. So, for our prompt, we're going to have our Viking yell a very specific line, and you can see we've put it in quotation marks here. And then, we have supporting information about the action inside the scene. I'm not going to read it out now because that would be kind of boring for the video, but I do recommend clicking the link below if you want to learn more. So, when you're ready, go ahead and click generate. This entire process is very similar to image generation. You're probably going to generate some outputs, and they're not going to be quite right, and you'll have to adjust your prompt and jump between different video models. It's entirely a part of the process. So, let's take a look at some of our clips here. So, we have our FIRST SHOT. NO! >> [screaming] >> PRESS ONWARD TO VALHALLA! [screaming] MAY ODIN'S BEARD BE WITH YOU ALL! OKAY. THAT'S ACTUALLY PRETTY GOOD. OF COURSE, we could generate it a few more times. There is just kind of some wonkiness on his face there, but honestly, not too bad. Let's take a look at our second shot. Okay, so that's good. Obviously, the continuity towards the end is a little weird. I don't know why it put a tower in the background, but all we really need of that shot is just about a half of a second. So, I think that may actually have what we're looking for. And then, finally, let's take a look at our third shot. This was generated inside of SeaDance 2.0, which is really good at physics. >> [screaming] >> Dang, son, that is really impressive. Okay, so now you'll take all of your video clips and edit them together inside the video editing application of your choice. At Curious Refuge, we either prefer using Adobe Premiere or DaVinci Resolve. It really just depends on your own personal preference. DaVinci Resolve is better for color grading, and Adobe Premiere Pro is integrated with the entire Adobe Suite, which is kind of helpful, especially if you work on a lot of different styles of projects. The next thing I want to show you is up-rezzing your footage. So, after you've edited together your scene, it's time to up-res to maximum resolution so you get really good quality. And there are a lot of AI video up-rezzing tools on the market. Topaz tends to be my favorite. So, you'll find a link below this video. So, I'm inside Astra, which is Topaz's video upscaling application, and I'm using a model called Starlight Precise. So, what I'm going to do is drag and drop our shot into the Starlight Precise section here. And for the output resolution, I'm going to select 4K just to give us more resolution. The base video was in 1080p, so we're going to get more resolution from this generation. And we're going to keep it in the precise model because I want it to be very similar to the uploaded video inside of this scene. And when you're ready, go ahead and click render. And once you have your video clips up-rezzed, you can then bring them back into your video editing application, work with your sound design, and really just bring your story together. Of course, it's always a back-and-forth process, but the magic of using AI is the fact that you can be inside of the video editing timeline and decide you want to change a shot, and you can totally do that. Okay, so hopefully you enjoyed this quick overview of the AI filmmaking process. I do want to let you know that we have a free intro to AI storytelling course over at Curious Refuge. It's completely free to you, and you get access to our online community of artists around the world. So, if you're looking to get plugged into this new era of creativity, I highly recommend checking it out. Thank you so much for watching this video. Be sure to like and subscribe if you want more tutorials like this in the future. I will see you in the next one.